Showing posts with label Photoshop. Show all posts

Monday, October 17, 2011

Photoshop Interface – Palettes and Menus

There are a lot of palettes in Photoshop and what you are seeing right now is my Essentials workspace. A workspace is the lay-out/set-up of your interface which is also very customizable as you’ll learn later on. A palette for example is the history and character palettes which you can view right at the top using the Window Menu. Again, just like your tools, if you don’t know what an icon stands for, just put your mouse on top of that icon to know its name.

You can also expand or collapse palettes using the black or gray double arrows at the top of that palette’s window just like in your toolbox. Also, the common thing about palettes is the palette menu found at the top-right corner of the palette. Function keys can also be used as a shortcut for some of the palettes. For example, hitting F7 would bring access to the layers palette. Hitting F7 again would hide the layers palette. Other functions include the F8 which brings up the info palette and F5 for the brushes palette. You don’t have to memorize all of them, just keep a few of the handy ones especially the palettes you use more often like the layers and history palettes.

We now go to our Menus Tab. I’ve had a brief discussion of the Photoshop Menu in this post: http://notes-on-hobbies.blogspot.com/2011/09/photoshop-basics-photoshop-interface.html but I’ll give a brief discussion of it here. Here you have the Image Menu where you have the image size command and also a quick look at the Adjustment sub-menu where you have your color correction tools and the most favorite of most Photo Editors, the Filters Menu. This is where you can apply special effects to your image at a click of a button. The usual Edit Menu where you can cut or copy your selection and some transform commands which gives you the option to rotate and warp your image.

And here is the File Menu. In the File Menu, you can create a new file, open files or images and save them – just like the usual File Menu in other programs. Now we’ll go to creating a New Document. On the File Menu, you can either click New or press Ctrl+N on the keyboard to go to the New Dialog Box. You can use this New Dialog Box to create a blank image or start from scratch if you don’t have an image to edit. At the top is where you can give your new image a name. I’ll name this new document – Imagery. You can set the width and height of your image and where you can also have the option to change the measuring unit you are going to use. For now we’ll use inches. Set it to 5 by 5 inches and leave it as a low resolution file with 72 pixels per inch. Set the color mode to RGB and click on OK.

The same thing with web browsers like Firefox and Google Chrome, Photoshop also has tabs which allow you to switch between opened files. Way down here at the bottom is the zoom field. There are two ways in which you can change the zoom level of your work. You can either type directly the zoom level you want like zoom to 50% view or zoom in to 150% or you can press and hold Ctrl on your keyboard and press the (+) plus or (-) minus sign. To the right of the zoom field is the info area. By holding the alt key on the keyboard and clicking here, you’ll get an info pop-up box stating the width, height, channels, and resolution of the image. Again, just hold the alt key and click on the area.

If you want to work on your images a bit closer, you may want to try pressing F key to expand the image screen to full for a better viewing experience. If you hit F one more time, a message will pop-up informing you about full screen mode and its features. Just click on Full Screen and your image will be isolated on the screen.

The cool thing about the full screen mode is if you remember the different shortcut buttons to get to the different panels, tools and so on, they will still work. For example, if I press V, I can instantly access the move tool, P for pen tool and B for brush tool. Hitting F again will take you back to the default view. I’m much more used to having all the tools and panels around but if you like, you can use the full screen mode with the gray background by pressing F then hitting the tab key to remove all the panels and use only what you need and when you need it.

For example, when you want to look at your layers, you can just press F7 and the layers palette will appear. When you are back at the default view, you can press shift+tab and the palettes will disappear but the options and applications bar will remain at the top. Shift+tab will get the palettes back again.

Copyright 2011 Notes on Hobbies | Photoshop Interface – Palettes and Menus

Monday, October 3, 2011

Photoshop Interface - Toolbox

Photoshop Interface - Toolbox To start off this tutorial on Photoshop's Toolbox, I've opened up a file for you here so you will see the true Photoshop interface when there's a picture open. I've got my Coca-Cola Can Glass Collection here (http://notes-on-hobbies.blogspot.com/2011/07/complete-6-coca-cola-can-glass.html).

The default location of the toolbox is at the left-most side of Photoshop but you can move this anywhere you see fit. There are many tools in Photoshop and if you're a beginner or seeing Photoshop's interface for the first time you may get overwhelmed but don't worry, with constant use and practice you'll be editing your photos without the help of tutorials or guides.

As I put my mouse on top of one of these tools, a tool tip will pop up. The tool tip helps you in identifying the name of that tool and also, if you can see the letter inside the parenthesis, for example in the Marquee Tool, the letter M is inside the parenthesis. This is the keyboard shortcut for that tool and you can press M on the keyboard to easily switch to the Marquee tool. Other tools also have shortcut letters like the eye-dropper tool – letter I and the eraser tool – letter E.

Shortcut keys are important for fast and convenient editing. For example, I want to select a portion of the picture I just press M to use the Rectangular Marquee tool and select an area on the picture. However, I want to switch to the move tool so I press V which is the shortcut for the move tool. So now I can move to another side of the image or move the image. There are a lot of tools but don’t be discouraged, just familiarize yourself with them and in time, you’ll be using the shortcuts with no problem.

If you noticed, most of the tools have a small black arrow at the lower right. This means that this tool has a fly-out menu which contains other tools under a certain tool category. For example if we click and hold the left mouse button on the Lasso tool, a fly-out menu shows two additional tools – the polygonal lasso tool and the magnetic lasso tool.

To easily access these tools, you can press and hold shift plus the shortcut letter of that tool and you can easily switch from any of the tools in that category. So if I press shift and M, I can switch from any of the Marquee tools and this applies to all the tools. Another way to switch from one tool to another in the same category is to press and hold alt then click the icon of the tool. This will make the tools rotate from one sub-tool to another.

For the last part of this tutorial, we have the color area at the bottom of the toolbox. The default colors for this are black for the foreground and white for the background. The foreground and background colors are important in other aspects of Photoshop but for now the basic is that the foreground color is the color that will show when you start brushing on your canvas. For example you use red for the foreground color; you can then start brushing red onto the image. To quickly get back to the default, just press the letter D on your keyboard.

In previous versions of Photoshop, the toolbox used to be shown in two columns. To do this you can press the two white arrows at the top of the toolbox and you can easily switch from one to a two-column toolbox. Another way to do this is to double-click on the gray bar at the top of the toolbox. You can also press and hold this to drag the toolbox anywhere you like.

Copyright 2011 Notes on Hobbies | Photoshop Interface - Toolbox

Thursday, September 29, 2011

I am Missing Photoshop

It's been a while since I've done a lot of editing in Photoshop and missing it makes me do these.


Copyright 2011 Notes on Hobbies | I am Missing Photoshop

Friday, September 16, 2011

Photoshop Basics - Photoshop Interface

For my first tutorial, I'm going to discuss about Photoshop's Interface. Photoshop, through the years, has evolved from a professional-only tool to a photo-editor even for a 12 year-old. Your first look at Photoshop may make want to stop looking from it or else you'll vomit but give it time and you'll see its true powers.

I'll be showing a screenshot of a Photoshop window and discuss what each number holds. By the way, I am using Adobe Photoshop CS5 for this tutorial.
Click image for larger view

1. Menu Bar

The Menu Bar displays 11 menus which when clicked will display a drop-down menu related to that button.

File - Let's you create new files, open files/images for editing, use Adobe Bridge™, save files, import/export, automate, and print your images.

Edit - Undo, Redo, Copy, Paste, Transform (resizing), and Preferences.

Image - In here you can change the color mode of your image/project, make the necessary adjustments, Auto adjust tone, contrast, and color; change image/canvas size, crop, and duplicate layers/images.

Layer - You can create new layer or other types of layers. All editing related to layers can also be found here like merging layers.

Select - This menu has everything to do with your current selection. You can also save your current selection and load them for later use. You can even manipulate your selection by increasing it by any amount of pixels that you like or even feather (smoother edges) your selection.

Filter - This menu probably is the most important and most convenient tool you need in Photoshop. Basically, this menu will give you options/presets of photo edits that you can do like making your pictures in cartoons. Using a combination of these filters can give you endless results.

Analysis - let's you analyze your image.

3D- is all about the settings for making your images look more 3-dimensional.

View- to make rulers, guides, and slices available. You an also zoom in or zoom out in the view menu.

Window - let's you look at the different sub-menus for each category like brushes, actions, and history.

Help - let's you update your version or know more about the product and of course - HELP.

2. Tool Bar

The tool bar let's you use shortcuts for the most commonly used tools in Photoshop. I'll leave a tutorial for an in-depth guide for this one.

3. Options Bar

The Options bar shows you the available choices you have for each tool. It typically lets you customize your tools. For example the brush size, types, and smoothness.


4. Workspace

The Workspace Menu lets you choose, customize, or save the interface of Photoshop. You can select which windows appear especially the ones you commonly use and lets you save those as a preset.

5 and 6. Windows

The image above contains the windows for the History and Layers, two of the very important and commonly used windows in Photoshop. I'll also leave a tutorial for the kinds of windows and their functions.

Now that you had a taste of what Photoshop has to offer, start exploring. You can never learn Photoshop in a day even if you spend the whole 24 hours studying it. It takes time, patience, and practice. If you managed to read the whole article up to this part then I think you've got what it takes to not really master Photoshop but to learn and apply it.


Copyright 2011 Notes on Hobbies | Photoshop Basics - Interface

Sunday, September 11, 2011

Photoshop Basics: The Tools of the Trade

As the 100th post in my blog,  I will be starting a new trend of Photoshop tutorials. Photoshop was first introduced to me by no other than my curiosity. I knew there were photo editors out there for the PC but I never knew about Photoshop until I met this picture while I was browsing for PC software installers to buy.
This picture made me curious about what Photoshop is capable of so that day, I bought myself a Photoshop installer. The actual CD is still with me and I've been using Photoshop since that day. I've made my first edits on my photos and got me into the business of photo editing real quick.

Although I have not used other photo-editing softwares, Photoshop has already satisfied my thirst for making impossible shots, possible. At first it was difficult but constant use and practice with a lot of video tutorials made me love using it. It will be more difficult especially if you don't have the passion for it. I think I had a great time learning Photoshop because of my passion for photography and photo editing.

I will make tutorials based on what I've learned throughout the years. There are a lot of tutorials out there and mine could be similar to them but mine will be according to the level of beginners. Some of the tutorials I read were complicated and I had a hard time understanding them. In my tutorials, I'll make sure you'll understand them in one reading.

First tutorial will be the tools used in Photoshop - what are they for and how to use them in a picture.

Copyright 2011 Notes on Hobbies | Photoshop Basics: The Tools of the Trade

Wednesday, July 8, 2009

Manga

After deciding on how to draw my characters for a major project coming up, I decided to draw my characters in that project in "manga" look. So I started learning how to draw them and got hooked to a site called Manga University. It's a cool site and if you like you can check it out. It teaches you how to draw manga characters from head to toe. Very useful and essential techniques can be tackled here.
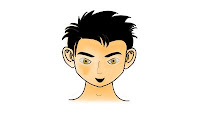
Here's my first digital character in manga(I've drawn using pencils and paper and they looked better because I had more control then. In my laptop, I have no tablet so it's all with the use of the pen tool in photoshop).
Manga university: www.howtodrawmanga.com

Wednesday, June 10, 2009

Illustrator

Right now I'm learning illustrator so I could get started with making my characters that I'm going to animate in after effects. It's really taking a lot of my time and I'm already excited to make my cartoon skit.

Illustrator is like photoshop but for me, it's more of like drawing things as vectors, they don't lose detail even if you scale them up. It still gives you sharp edges not like in photoshop where the picture would pixelate. So I'm gonna continue watching the tutorials! :-?